
If you want to know how to do a compression test, the good news is that it is a reasonably straightforward task that you can carry out on your classic car. An engine compression test gives a great insight into the condition of piston rings, valves and head gasket and can inform your next move in tuning your engine.
Follow this link if you want to go straight to interpreting the results of an engine compression test.
This post contains affiliate links or sponsored content. See my Disclosure Policy for more details.
Preparation


")
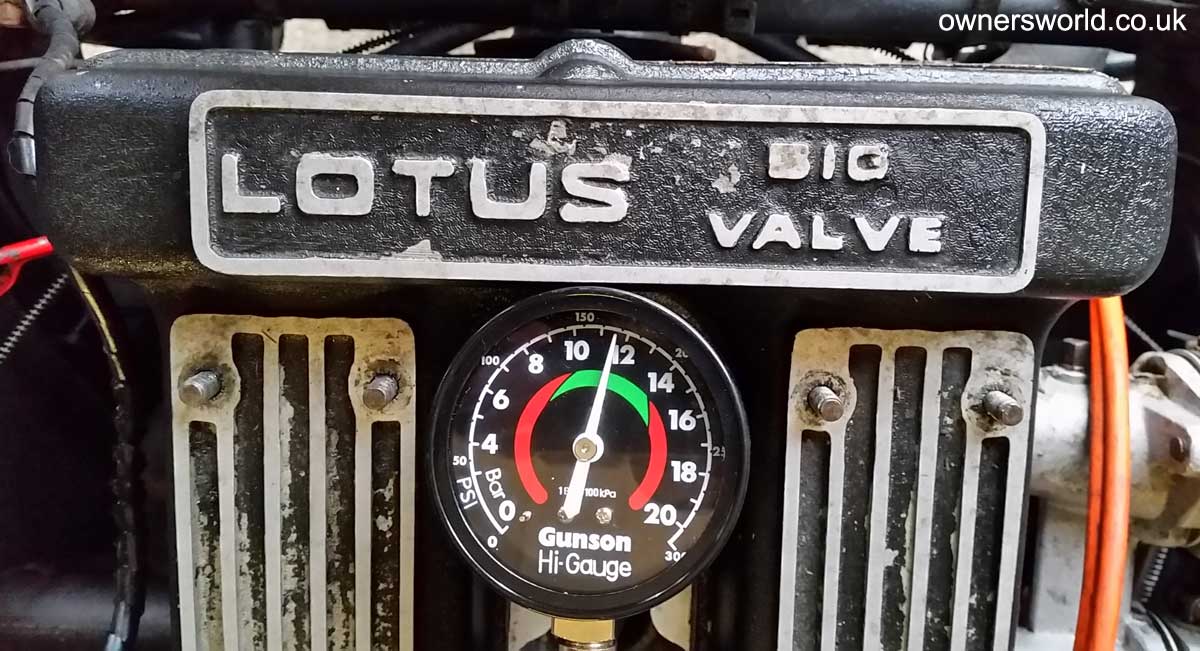
- Ensure that you have the correct equipment. I use the Gunson G4101 Hi-Gauge Compression Tester and have been very happy with it.
An engine compression tester for a petrol engine is not appropriate for a diesel engine as diesel engines run at much higher pressures. - Before you can carry out the test, ensure that your battery is fully charged so that you can maintain a constant cranking speed across all cylinders.
- Run the engine up to normal working temperature; about 10 – 15 minutes.
- To prevent electric shock from the HT circuit (and accidentally running the engine with the Engine Compression Tester attached), disable the ignition system. Remove the coil supply lead (marked SW or + on a negative earth car).
- If you have fuel injection, disable it; you don’t want a petrol shower!
- Label all of your spark plug leads before removing them to ensure that you can refit them in the correct order
- Clean around the spark plug insets to prevent dirt and grit from getting into the cylinders. If you have an air line, this will be the best way to clear the area (don’t forget your safety goggles !)
disclaimer
The information contained herein is not meant to be comprehensive and is for information and entertainment purposes only.
You should not undertake to perform anything described herein without adequate training and/or supervision.
The author disclaims any responsibility for any injury, damage, or loss as a result of reliance upon the
information found on this site/blog.
Please see Terms for more details.
How to do a compression test
Having completed the preparation, you can use your engine compression tester on each cylinder in turn. You may need someone to help with this depending on the car you have. You need to be able to crank the engine over; hold the throttle open and see the pressure building on the gauge all at the same time.
Repeat these steps for each cylinder:
- Remove the spark plug.
- Ensure that you have reset the engine compression tester to zero and then screw it, fully but lightly into the spark plug hole.
- Open the throttle fully (this allows the maximum amount of air through the inlet valve and into the cylinder) whilst turning the engine over.
- After 5 or 10 seconds, the reading on the gauge should have stabilised. Note whether the pressure built slowly or quickly; this will help with interpreting the readings.
- Make a note of the compression for that cylinder.
- Reset the gauge and remove it from the spark plug hole.
- At this stage, if the reading is low, squirt some engine oil into the cylinder (about a tablespoon) and redo the engine compression test for that cylinder (this is a “wet” test). Make a note of the revised reading (I’ll explain this in the section about interpreting the results.)
- Replace the spark plug and move on to the next cylinder
And that’s how to do a compression test! pretty simple and it only takes 30 minutes to perform an engine compression test even if you include warming the engine up.
Interpreting the results

OK, so you have your engine compression test readings for each cylinder but, what do they tell you about your engine?
Firstly, check that the readings are in line with the manufacturer’s specification. Did the compression build up quickly? (30 or 40 psi per compression stroke) If so, good news!
Next, all of the readings should be more or less the same. The difference between the highest and lowest reading should be within about 10 psi (0.7 bar). If there is more than 15 psi (1.0 bar) between the readings, then you are likely to have a problem.
If all of the readings check out ok, that’s great. Keep a note of the readings and redo the engine compression test every 12 months. You will then be able to spot any problem trends over time and fix issues before they ruin your engine.
If the readings point to a problem (either low or high compression), you will need to investigate a little deeper to isolate the problem.
Low Compression
If the compression was slow to build and the final reading is low, you added a squirt or 2 of oil into the cylinder. The idea behind this “wet” test is to improve the seal between the piston rings and the cylinder bore.
The second (wet) reading was much better than your first (dry) reading.
Piston Rings / Cylinder bores – Piston rings are probably worn or broken or the cylinder bores are worn or scored. Check for blue smoke (burning oil) coming from your exhaust.
If the second (wet) reading didn’t really improve over the first (dry) reading.
Head Gasket – The head gasket may have failed, allowing the pressure to escape from the cylinder.
Check the readings for the adjacent cylinders. If either of these is also low, then the head gasket has almost certainly failed between these cylinders. This may also point to a damaged cylinder head surface or cylinder block surface.
Valves Clearances – Clearances too tight: This causes the valves to remain open during the compression stroke.
Check and adjust valve clearances and redo the engine compression test.
Valve Springs / Stems – Broken or weak valve spring or, bent valve stem or sticking valve guide.
Any of these problems will stop the valve from being forced back into its closed position, leaving it open during the compression stroke.
To check the valve springs, I use a large screwdriver to push down on the valve spring retainer and compare its resistance to another spring that is known to be good. You need to position the cam such that the valve should be in its closed position.
It is particularly difficult to identify a broken spring this way if your engine has twin valve springs.
Be careful that the screwdriver doesn’t slip and damage you or the engine!
If the spring is ok, then suspect the valve stem or guide.
Valve Seats – Burnt valve seats. The valve won’t be gas-tight, so compression will be reduced.
If the engine is idling roughly; backfiring and misfiring, then you may have burnt valve seats (normally the exhaust valve).
Valve Timing – Valve timing is incorrect. This leads to the valves opening and closing at the wrong time in relation to the crankshaft position. The valves will still be open during the compression stroke.
This is a serious issue and needs immediate attention; it can lead to bent or broken valves and damaged pistons if the piston hits an open valve. You should not run the engine again until you have resolved the problem.
Check the condition of your cambelt/timing-chain. Replace if necessary. Check and correct the valve timing.
Very low or zero compression
Various ! – This is a bit of mixed bag but is likely to be serious. The problem could be broken crankshaft; broken con rod; holed piston; broken or jammed valves …
This is a serious issue and you should not run your engine until you have resolved the problem.
As a minimum, you will probably need to remove the cylinder head for further investigation and diagnosis.
High Compression
Carbon build up – excessive carbon build up on the cylinder head and piston crown can reduce the volume of the cylinder, leading to a higher compression ratio. This can lead to pre-ignition and in turn, can lead to engine knocking (aka pinking, detonation …)
If the engine overruns when you switch it off after going for a drive, this is probably caused by pre-ignition due to a build-up of carbon … time for a decoke!
Fluid in the cylinder – Assuming that you haven’t driven through flood water recently (which can cause this problem), it is most likely to be a leaking head gasket / warped head / damaged block that has allowed water or oil into the cylinder.
Carefully put a long screwdriver through the spark plug hole until it lightly touches the top of the piston. Pull it out and check the end for water, oil or fuel (as if it were a dipstick). It should come out dry.
If there is significant fluid in the cylinder, you should not run the engine again until you have resolved the problem. There is a real risk of hydrolock (Hydrostatic Lock) which can have catastrophic consequences for your engine (broken con rods, crankshaft, block … it’s bad!)
Summary
So, now that you know how to do a compression test, it will almost certainly be your first point of call if your engine is running poorly and is down on power. It is quick and simple to do and a DIY engine compression tester is not expensive.
I have written an article that looks at another tool, a Cylinder Leak Down Tester. This gives a similar but more specific diagnosis of the condition of the cylinders. If you carry out both an engine compression test and a leak down test, the results can be combined to give further information about your engine.
If you have any further tips on how to do a compression test, please let me know in the comments below and I may include them in the next revision of this article.
Nice article, thanks. I have been struggling to get my MGF through the emission test. I’ve just followed this article and diagnosed a Cylinder or piston ring problem. Three cylinders at 13 bar and one at 11.7 bar. I dropped some oil in the low cylinder and it jumped to 14 bar. Hoping it’s just a sticky ring rather than worn bore or broken ring.
Thanks Phil. I hope to get the article about Leak Down Testing up in the next week or two. Good luck with the MGF emissions!
I suspect an engine rebuild is on the cards. Just researching different ideas for unsticking sticky rings. May be able to drop the piston out through the bottom with out disturbing the head but not sure if I can get the sump off in situ.
so, what is a good pressure for a midget 1500 ’77?
Hi. That is a tricky one. The Haynes manual only gives the compression ratios for the 1500 (UK 9:1 and US 7.5:1) Having hunted around the forums on the internet, there doesn’t seem to be a definitive psi number. The best that I can come up with is about 120 – 140 psi for the UK spec car.
Thanks Steve, that has been my experience too.